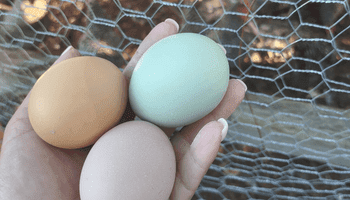
It is chicken butchering day, and we want to butcher out our two roosters that are at an age to get butchered out. We hatched these from our easter egger chicks and so they are both easter eggers, but won’t be laying any eggs because they are roosters. The reason we’re butchering them is that we don’t need any other roosters in our flock. So, these guys are getting the knife today, and I’m here to share with you the entire process of how to butcher chickens for beginners!
How to Butcher a Chicken for Beginners:
- Equipment you need to butcher chickens
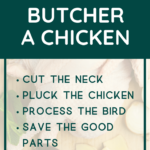
- How to cut a chicken’s neck
- How to remove chicken feathers
- How to process chickens
- Chicken parts to save
- How long to let chickens rest after butchering?
- How long do you raise a chicken before butchering it?

Disclosure: This post may contain affiliate links. If you purchase a product through one of our affiliate links we make a small commission from the sale at no extra cost to our readers.
How to Butcher a Chicken for Beginners
I’ve heard that mean and unruly roosters taste better and today, we are going to find out. This post will cover the whole process starting with the equipment you need to butcher chickens.
Plus, how to cut a chicken’s neck, how to remove chicken feathers, how to process chickens, and safe storage methods.
And super important tips on which chicken parts you can save.
1. Equipment You Need To Butcher Chickens
Before we get chickens out of their coop, we start by setting everything up.
This is essential to make sure we’re not running back and forth during the process.
Now, there are several ways to butcher a chicken.
You can use an axe, you can swing it around until you snap it’s neck, or you can use a knife and a killing cone.
I use a knife and a cone simply because it’s easier for me to manage.
Here’s everything you will need:
A very sharp knife
The first time I tried to butcher out a chicken my knife was less-than-razor-sharp. Which made it a horrible experience for both myself and the bird.
Nowadays, I make sure that my knife is sharp before I butcher my birds. A sharp knife allows you to make quick, clean cuts, which doesn’t prolong the chicken’s suffering (and makes it easier for you.)
Now, I like to use a fishing fillet knife because they’re light and easy to handle – and they’re cheap.
A sharpening stone
Of course, after the first several uses, your blade will likely become dull. Which means it’s time to sharpen it. This whetstone is easy to use and gets my blade razor sharp.
A Killing cone
A killing cone is super important because it helps you to hold the chicken in place to prevent it from flapping around.
Basically it looks like a metal upside-down traffic cone with one broad end and one narrow end.
You attach the cone to a tree or wall (whichever works for you) and then insert the chicken, upside-down, into the cone – with it’s head sticking out of the smaller hole.
This holds the bird in place for butchering.
I use this one and it works for all types of poultry.
A bucket
You can also choose to put a bucket under your cone so that when the chicken bleeds out, it doesn’t get everywhere.
I’m completely fine with them bleeding out onto the tree on our property because we’re in the middle of the woods.
But if you want to prevent a mess, get a bucket.
A cooler
We always have a large cooler with some ice in it so that when we process the chickens, they stay fresh until we can get them into the hot water.
This is especially true if you’re butchering multiple birds at once or if you don’t have any help.
A turkey fryer
This will be for scalding the chicken in hot water after it’s dead.
By doing this, the feathers loosen and it’s much easier to pluck the bird.
This is the turkey fryer I have and it makes it super easy because it comes with everything you need.
However, if you plan on skinning the bird, you can skip this step.
2. How To Cut A Chicken’s Neck
For a beginner, butchering a chicken can feel like a difficult thing to do, but it’s not. Once you get in the right space to do it, it’s quick and easy.
First, we’ll take the chicken swiftly and put him inside the cone. You want his head to go down first so it can come through the narrow side, which faces the ground. His legs should be up in the air.
Just keep in mind that the chicken won’t go down without a fight so what you do is grab the legs and hold him upside down. He’ll start getting a little bit less tense after a few moments.
Put him through the cone head first, but be careful he doesn’t peck you.
You want his head all the way through the narrow part of the cone, which means you might have to pull it gently down.
Next, grab the underside of his neck where you’re going to make the cut. This should be just under his head on the front of his body.
The move away all the feathers because this will not only dull your blade, but it’ll make it very uncomfortable for everyone involved in this process.
With a very very sharp knife, make a deep, clean cut as quickly as possible, and let the bird bleed out.
I just like to hold it because it does start flapping and then sometimes it’ll whip around and can get out of the cone.
Once I feel the muscles relax, I let go.
Then cut off the head.
This part will require some effort, but try to get in between the bones and snap the next with your hand if you need to.
Oh, and if I didn’t mention already, make sure you’re not wearing something that you’re very attached to because you’ll definitely get blood on it.
3. How To Remove Chicken Feathers
As we already discussed, it’s best to have everything set up ahead of time.
We have our propane tank, which we removed from the grill, connected to the turkey fryer.
It is filled with water all the way to the top (or almost to the top) and then we let it heat up.
We like to get the water to about 160 degrees to make sure it’s hot enough to dunk in the birds. This will soften the feathers.
What you want to do is to take the bird and put it in the hot water, upside-down. Grab it by the feet and use that to “stir” the bird around.
You’re not trying to cook the bird so don’t let it stay in the water for too long. You want to make sure that the feathers are nice and hot so that they come off easily.
I always like to test the ones on the wings first because once they start to come off easily, you should be good to go. Just be careful not to burn yourself!
After you have made sure the feathers are coming off easily, it’s time to pluck the chicken.
I find it a little easier to do it in the sink under running water because they come off pretty easily and you can clean as you go. It also helps the feathers to get wet and not stick to everything.
But you could also do this on a plastic table with a hose – or if you really want to commit – with a chicken plucker!
Start by removing the wing feathers and the larger feathers first.
Then as you go, pluck out the smaller pin feathers – that’s the hard part.
Just do your best, you can always remove any stragglers later!
Psst…want to steal all my suburban chicken secrets? Check out my FREE start guide to raising chickens in the suburbs!
4. How To Process a Chicken
Processing the chicken requires more focus because if you cut some organs, you can contaminate the meat. Here is how to process it.
Have the chicken on its back and bend the legs down by the feet. There’s a little joint type of thing on the knee and you’re going to cut through it to get the feet off.
Then, while it’s still on its back, cut the neck out. Do this by cutting through the skin carefully and pull the neck out next to the tubes running parallel to the neck – the trachea and the esophagus.
Just make sure you don’t cut the crop – that’s where all the food is stored before they digest it. Cut around it to get the neck out.
Next, lay the bird on its stomach.
Carefully insert your knife between the back and the tail and cut through the vertebrae – making sure not to cut the tail off completely.
Then cut gently around the tail, but do not cut through the intestine.
If you do this correctly, you should be able to see the intestine and cut around it. And then you’ll have two separate pieces – the tail and the rest of the body. They should still be connected by the intestine at this point.
Next is the fun part – time to remove the guts. Lay the chicken upside down and make an slight incision somewhere on the underside so that you can start getting the insides out. Pull them out and you’ll see that they’ll just slide right out.
Now you can remove all the other organs such as gizzard, lungs, liver, heart and all the good parts by sticking your hand inside the bird and pulling them out.
At this point you can give it a rinse and you have successfully processed your bird!
If you’d like, you can throw away all the bird’s insides – but I would encourage you to keep at least some of the parts!
Chicken Parts to save
You can eat most parts of a chicken including the feet. And of course, some parts such as the esophagus, trachea, spleen, and all that stuff can be discarded (or fed back to the other livestock, or composted.)
You won’t want to eat the intestines. But anything that’s muscle is edible.
Personally, here is what I save from the chicken:
- Neck – great for broth or a good chicken neck recipe
- Gizzard – usually fed to our dog, he loves them – slice it open to get out the icky stuff!
- Liver – also usually goes to Milo, but can be used to make pate – just be careful to cut away the gall bladder first
- Heart – same here, Milo gets a lot of treats!
- Feet – these get washed, blanched, and used for stock – extras go to the dog
- Head – you can technically eat them, but usually they get tossed into the woods away from the chickens (or used for maggot buckets)
HOW LONG TO LET CHICKENS REST AFTER BUTCHERING?
The last thing that you have to remember is you’re going to want to let your chicken sit for about 48 hours before cooking or freezing.
Once you have butchered any animal they go through rigor mortis, just like in people. This will tense up the entire body, which makes it very tough to eat.
As soon as you finish processing the bird place it in water with a bit of salt (to create a brine) and let it rest for at least 48 hours.
After which you can cook, freeze, or do whatever it is you’re going to do with the bird.
If you’re going to freeze the chicken I would recommend cutting it into pieces (if you haven’t already) and putting them parts in vacuum sealed bags before placing in the freezer. This will save you so much space and allow you to store more food.
How long do you raise a chicken before you butcher it?
How long you need to raise a chicken before butchering it will depend on the type of chicken you are raising. Birds specifically sold and raised as “meat birds” (such as Cornish Cross chickens) will take significantly less time to raise – often between 2-3 months.
However, dual purpose chicken breeds, like Plymouth Barred Rocks, and heritage breeds will take between 5-6 months to reach butchering weight.
And even though the meat chickens take less time to raise, it is difficult to become self-sufficient with these types of birds since they are a hybrid breed and it is difficult to hatch them out yourself. That is why I recommend a dual-purpose or heritage breed of chicken for self-sufficiency.
Hopefully this guide on how to butcher a chicken for beginners has been helpful! And if you’re looking for even more tips on raising chickens in the suburbs, don’t forget to check out my FREE Simple Start Guide to Raising Chickens in the Suburbs!
PIN how to butcher a chicken for beginners